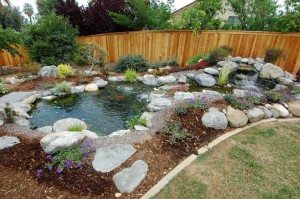
You can simply bring the beauty of nature and the splendor of wildlife into your backyard by creating your own backyard pond. The project will take time and a lot of hard work but you’ll be rewarded handsomely enjoying the fruits of your labor for many years.
Creating your own backyard pond is a great way of teaching your family all about conservation. This fact was highlighted in recent research undertaken by the Department of Agriculture’s Natural Resources & Conservation.
Before starting your backyard pond project:
- you’ll need to design how you want your pond to look
- know the level/depth of the pond
- decide on the filtration system for the pond – external pumps, submersible pump or solar pump
- research how to add protective linings
- choose the type of fish that you want in your pond
- choose the rocks and plants that you will use
7 easy steps for creating your own backyard pond
Step 1: Create the design and plan for your pond. Do this using paper and colored pencils. Note the rocks, fish and plants that you’ll use. Plan where the lighting and filters will be placed.
Step 2: Using a water hose, outline the shape that you want your pond to have either on the grass or dirt. Spray paint the design following the outline of the hose.
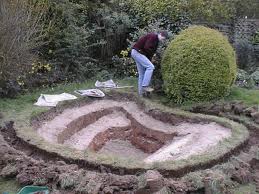
Step 3: Following the painted outline, with a shovel dig out the grass. Continue digging out the dirt until you get to the desired level you want for your pond. Using a measuring tape align all the measurements to your design specifications. Using a wheel barrow and a shovel, remove all the dirt that is around the pond area.
Step 4: Fold out an underlayment for ponds. Line the bottom of the pond. Smooth out any large wrinkles that are present. On top of the underlayment, add the pond liner. This will act as a waterproof mechanism. Additionally, it will help to smooth out any wrinkles that are left at the bottom of the pond.
Step 5: To cover all the outside levels of the pond (as well as to hide mistakes), place large rocks on the exterior of the pond. If there are any holes, add gravel and ensure that you fill them on all levels. Place flat rocks that you can sit on the side of the pond and to ensure their stability place other smaller rocks and gravel beneath them.
Next, read the manufacturers directions (of the pond liner) before adding water to the pond.
Step 6: Add some plants to the exterior of the pond but leave them in their pots. For a dramatic look, place the plants below and above the water line. Water lily pots are suitable because they will remain floating in the water. Add some more floating plants into the water. This creates a very appealing effect. I find it relaxing to watch them slowly floating by in the water.
Step 7: Add the fish in a plastic bag with air holes for about 20 minutes to acclimatize them to the new temperature. (Put the bag into the pond water. Leave the fish in the bag for another 20 minutes.) Open the bag and let the fish swim out on their own.
Find supplies for your project here
Enjoy your backyard pond for many years to come.


